by Loïc
 click to enlarge
On the enlargements, the few traces that can be seen are due to a long and busy life ...
 Here is a little odd job not too difficult to do. You should enjoy it (We did !). The purpose is to build a small boat propelled by means of a steam engine. Here is a little odd job not too difficult to do. You should enjoy it (We did !). The purpose is to build a small boat propelled by means of a steam engine.
Historical :
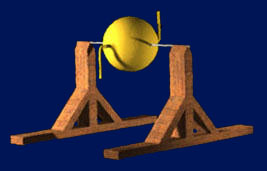
100 years B.C. Hero from Alexandria built a sphere filled with water, provided with elbow-like pipes, and rotating above a fire thanks to the reaction involved by the steam exhaust. The pop-pop engine works slightly like this, but the exhaust is inside the water. This should look like this:
In the nineteen eighties, the popular scientific magazine "La Nature" detailed the realisation of such an engine. In 1914, the German toys manufacturer Ernst Plank proposed on his catalogue some models of boat fitted with pop-pop engines. You can made some research on the web in order to have a more detailed histrorical.
A few years ago it didn't seem easy to buy pop-pop engines (in France). Now, more and more shops sell various products. We can find the same products on web auction sites. Be carefull about the prices ... they are sometimes very prohibitory for buckled plate boats often imported from the Far-East.
Etymology :
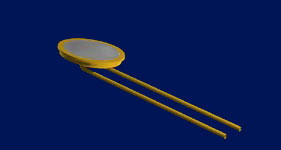
Pop pop ... pop pop ... is the sound emitted by pop-pop engines that are a little bit more complicated that the one described in this article. In fact we will look into coiled-pipe engines that are quasi silent. Those which emit a pop-pop are (very likely) based on the same principle, but they look more or less like the hereunder sketch :
The lower face of the dish is a rigid metallic disk, while the upper part is a diaphragm made of thin metal so that it moves depending on temperature or pressure changes
or both. (For me the question remains wide open). I didn't buiuld this type of engine (thouhg with a few pieces of brass or copper and a soldering iron, it's relatively easy) and then I would suggest you to go to other web pages, like this one for example.
Construction :
Before going deeper into it, let rush to the nearest hardware store to buy a brass pipe of 3mm external and 2mm internal diameters. While you are at it, add a tube of epoxy glue. Then, back at home, after a deep breath, look for a small Styrofoam tray for meat (without meat ...) and for a metallic screwing cap as there are on some bottles of alcohol. (If you don't use to recover this kind of things, wait until
or grill a steak with alcohol !...). Once you have collected the requested raw materials, you are ready to start !
Let's go! Hum, yes, but what first ?
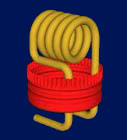
We start with the most important part which is the engine. The pipe is to be bent as shown on the picture, using your fingers and a pair of pliers. (Be careful not to damage too much the pipe). Use as a guide an appropriate piece of equipment (reuse, tool handle, piece of wood
). If you try to work directly with the pipe you bought, it will be difficult to get something good. The pipe will flatten. Therefore, prior to that, you must anneal the pipe. Don't panic! To do that, it suffices to heat it up to it becomes red. (With a butane torch it's easy). Then, let it cools down slowly in air. When doing that, the atoms arrangement of the material is modified, and some characteristics such as the softness change (which is convenient for us !). Another alternative could be to fill the pipe with soft metal (tin), to bend it, and at the end of the job to heat it in order to make the soft metal melts and goes out. This last alternative seems less evident to me
Both shapes are possible, the right side one being perhaps better for heat spreading and for excess heat evacuation.
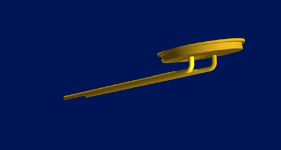
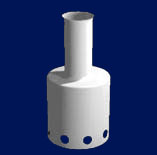
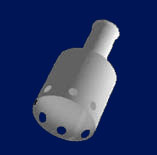
Now, let's come to the rest of the boiler. To make it, the screwing cap is to be drilled, and the coil is to be glued to it by means of epoxy, as shown on the sketch. You could object that the glue will not sustain the heat
Don't worry! Experiments showed that it works fine
Nevertheless, should you doubt, you could use a "cold welding paste" sold, as a sausage that you just have to knead before use, in the plumbing department of the hardware store.
Covering is not needed if you intend to use the engine at places where Eole doesn't blow
As this is not common, even inside, here are some suggestions.
If you are good in reuse, you could take aluminum housings of big capacitors. Mind there is no remaining voltage! Cut the bottom, take off the guts of the beast, drill some holes (at the bottom for air inlet and at the top for gas exhaust), and that's it.
If you are the sort of guy who throws away everything, take an aluminum foil and fold it as you can
Elsewhere
Let your imagination run free
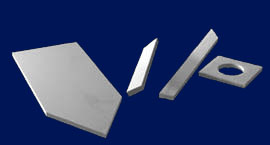
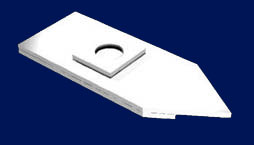
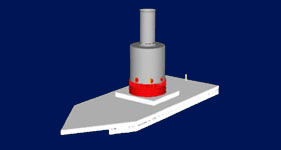
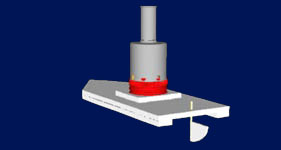
Now, a float is needed (Indeed, it doesn't look like a boat hull !!!). Cut the Styrofoam tray more or less according to the sketches. Then, glue the 4 pieces together with a little bit of epoxy (or Styrofoam) glue.
You drill two holes for the pipes going through, and it remains to glue the boiler at its final location. On this float, it is useful to add a rudder: a tooth-pick and a little piece of tray will suit. Now, theoretically you should have in hands something looking like this :
Principle and operation :
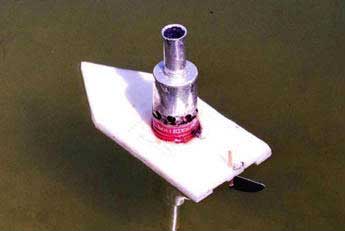
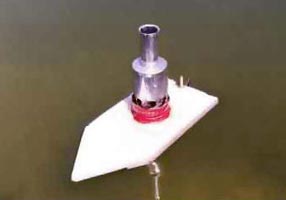
To do it runs, the pipe is to be filled with water by means of a syringe (for instance) and to put the boat on the water, taking care not to empty the pipe. Therefore, put a finger on one of the pipe ends until the boat is on the water. There, the atmospheric pressure exerted on the water is high enough to avoid the water exhausts from the pipe. (Insofar as you don't use a coil more than 10.33 meters high you should not be in trouble !!)
Then the fuel is set on fire. The resulting heat warms up and vaporizes the water located in the spirals, which goes towards the end, and propels the boat by reaction. This involves a low pressure in the pipe which sucks water. This priming initiates a new cycle.
For further details go to this page...
Concerning the fuel, there are several alternatives :
- As I do it, i.e. a small amount of jellified fuel (available in supermarkets) intended to be used for fondue warmers.
- OYou as well could use a small swab of cotton soaked with burning alcohol. Mind not to poor everywhere because Styrofoam burns well !...
- Another alternative is to use candle wax. You therefore have either to poor some wax and add a wick, or to cut slices in a candle, that is probably simpler.
 click to enlarge
The final word :
Here are some ideas, rather definite I admit, to build a simple device allowing to testing a propelling mode. However, it is obvious that nothing is fixed, and you can (you must !) let your imagination run free. You could for instance put several engines in the same and more realistic hull, and (why not?) add a radio control ...(as R. Lefèvre, to whom I borrowed the small historical of the beginning of this page, did it).
Translated by Jean-Yves. Thanks.
« Back to "Pop-Pop"
|